Wednesday 25 March 2015

11/52 - Riveting Swirls


This challenge piece was made on a workshop I attended recently, Art Clay & Glass Cold Connection by Riveting taught by Erna Piechna-Sowersby. It was at Creative Glass in Rochester, UK. 

Erna had brought some beautiful sample pieces to get us inspired to start with. During the workshop she also found time to show us examples and photos of some of her other amazing work. She is very talented! :)


There were eight of us on the workshop and we were a mixed bunch! Most people had glass experience and none or not much Art Clay experience. For me it was the other way round. I've played with fusing glass but have never been on a workshop on it, so most of my knowledge (such as it is!) is gleaned from the internet, and I didn't really know anything about cold working glass. 


We all had a great time and there was a lot of fun and laughter. 
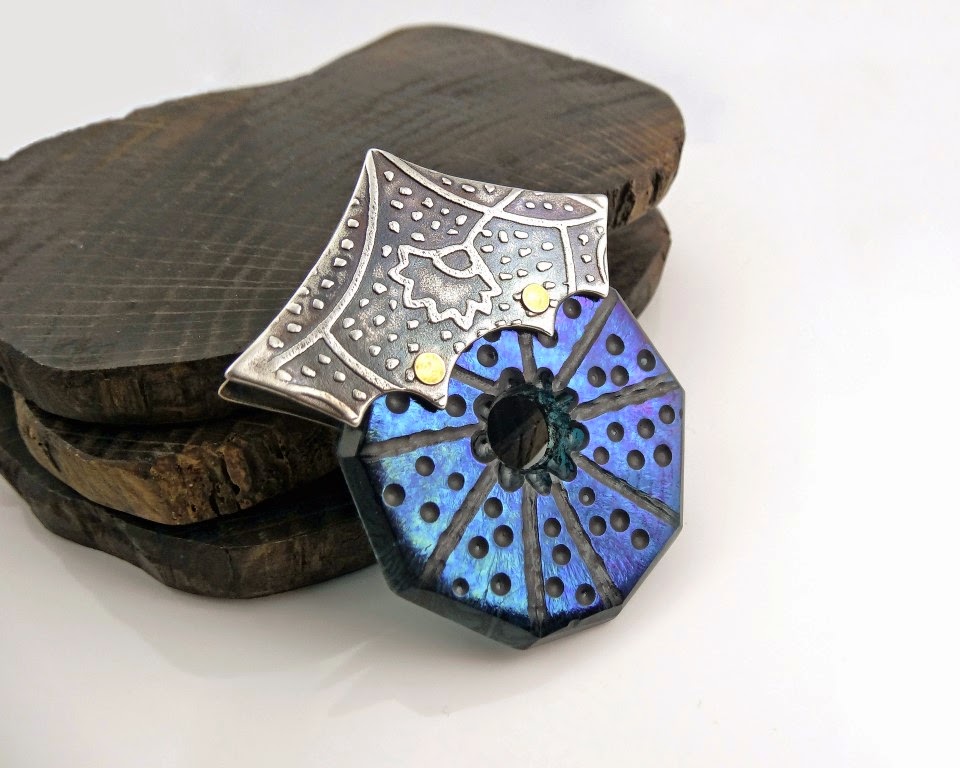
On the first day we each started off with two pre-fused blanks of iridescent glass. One was circular and the other roughly semicircular.

During the morning we learnt how to cold work the glass to shape and engrave it, and also how to add texture and colour using Color Line Enamels. In the afternoon we went on to using the Art Clay Silver to make silver elements to be attached by riveting. Overnight the glass was refired to fire polish it and the silver was fired.

So on the start of day two all our efforts were out of the kilns and waiting for us.


 These were my two pieces of glass. A bit strange I know, but I was more concerned with playing and learning techniques than what I actually made!! :)


During the second day we learnt how to correct any problems with the glass or silver pieces and how to connect the pieces with riveting!!! :) Hitting a piece made of glass with a hammer was a bit nerve wracking for me to start with!! We had a choice of brass or silver rivets, I really liked the contrast of the brass so I went with those.


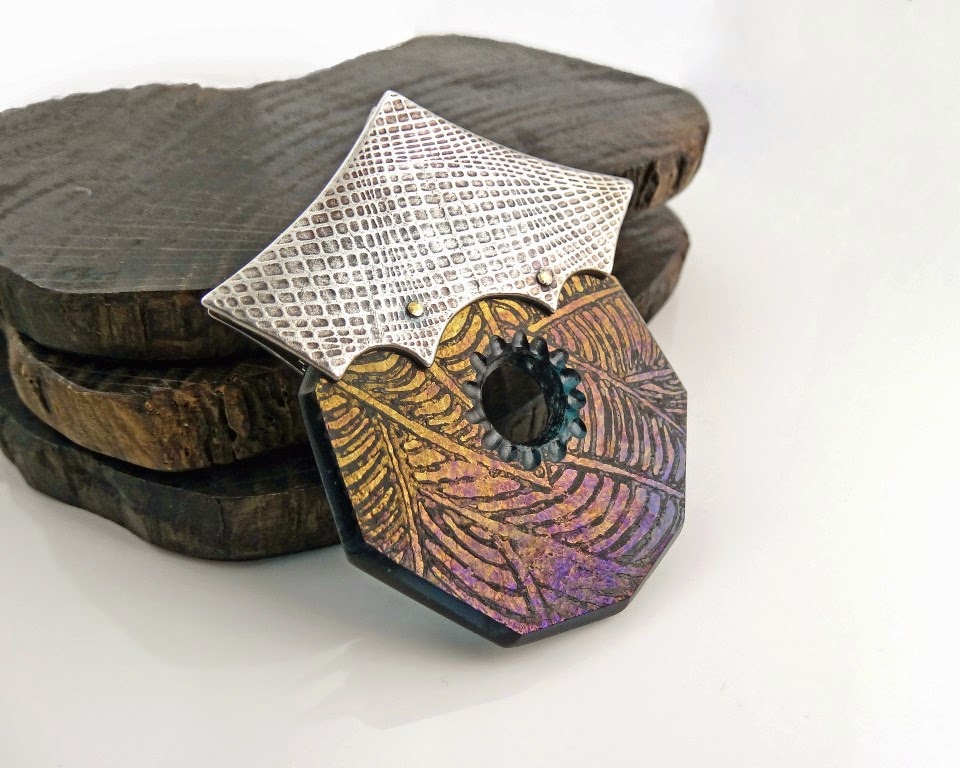
We had worked on both sides of each piece of glass so I made this piece reversible.

I like the second side the best, it has some lovely colours in it. (I've also learnt iridescent glass is not easy to photograph!!).

My challenge piece only has silver on one side as I wanted to try both methods of riveting.


Everyone made amazing pieces, all of them had wonderful colours. I didn't manage to get a photo showing all the colours very well...still you get the idea! :)


You can tell we enjoyed ourselves!!!


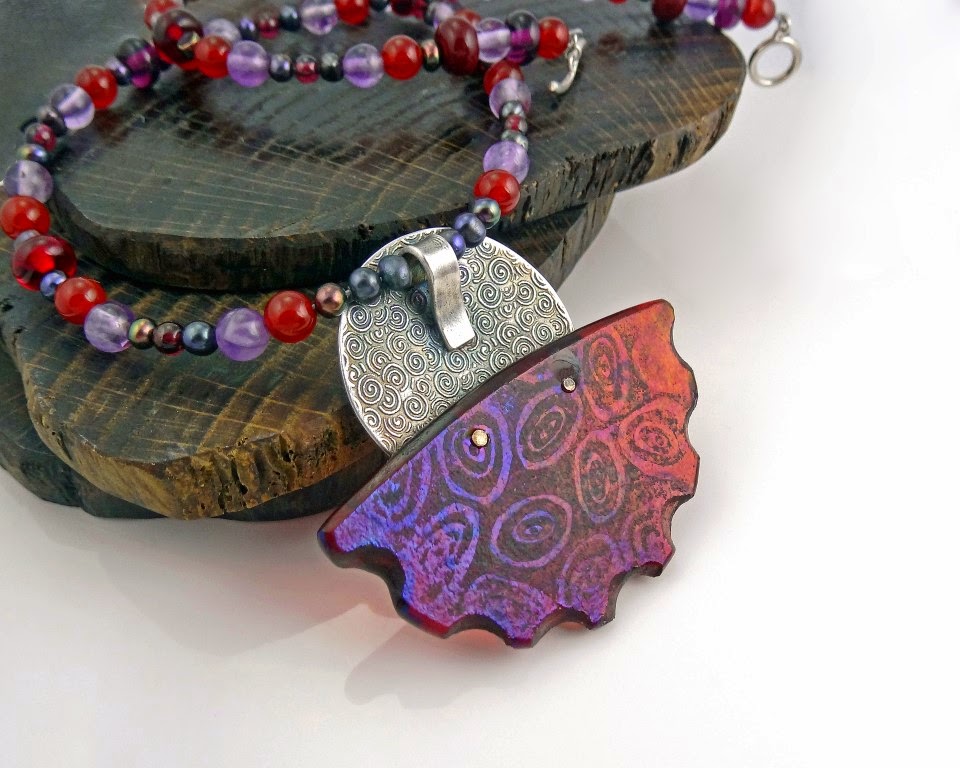
Finally when I got home I decided to add a beaded necklace to the piece I liked the best. A bit of beading mayhem ensued...


...and I put together a mix of amethysts, carnelians, garnets, pearls and lampwork glass beads. I was quite pleased as it is only my second piece of beading :)


I'm looking forward to finding a bit of time during the year to play more with these techniques. 

Erna is a wonderful teacher and I thoroughly recommend this workshop if you get a chance to go on it!! :)

Have fun!

Joy x


Friday 13 March 2015

10/52 - Mystical Moon Flask

Nearly a fifth of the way through the year already!! Wow the time is going fast.

So this week we are back to the Moon Flasks :) You might recall my very first challenge piece at the start of the year was also a Moon Flask - Chinoiserie Dreaming. Here are the two flasks together. The circular part of each flask is exactly the same size, just two very different looks. It's quite an optical illusion isn't it? :)


For this Moon Flask I've incorporated the stand into the flask, and gone all fancy with the stopper!! :) (I blame Ann Davis for that - I could tell she thought my first stopper was a bit plain, even though she didn't say as much - lol!!)


This flask has a higher neck, and I went really OTT with the stopper! Here is it before firing - tiny!! 

Making it was fun!!

The finished Mystical Moon Flask can be worn either way round as it is enamelled on both sides.


I'm very excited that I will be teaching this as a workshop both in the UK and in the USA this year.

In May I will be at La Ruche Davis, Washington DC, USA and I'll also be teaching a one day Chain Sampler workshop while I'm there. These little flasks make wonderful little perfume bottles, and we will even have a fun extra accessory on that workshop!! ;) 

If you want to know what it is you'd better book and come along!! :D

Have fun!!

Joy x 

Wednesday 4 March 2015

9/52 - Midnight Garden


This week my challenge piece is another wand pendant. This one is blue goldstone. It has lots of lovely sparkly bits in it, especially when the sun hits it. Blue goldstone is in fact a man made material, and this wand is nice and round in shape, and super shiny!! It was a real problem to photograph!! I started off on white in the light tent, but not much sparkle! I normally photograph in a tent to avoid reflections, but as the sparkle didn't come up very well I went for some photos in natural light on a dark background as well. You'll have to put up with the reflections on those!! :)


Goldstone was first made in Murano, Venice in the seventeenth century, if you are interested you can read more about it here. I decided some nice glass beads would be the perfect combination to go into the chain and I knew I had some Murano glass beads that might match in well. I'd seen them only recently, but do you think I could find them!! Of course after a while of searching it becomes a challenge in itself! They had to be somewhere, and I wasn't giving up!! 


When I eventually found them they were somewhere I had already looked, not in the sort of bag I thought I was looking for, oh...and they were totally the wrong blue after all that :) Oh well...


In the process of searching though I found a few lampwork beads by Izzy Anderson of Flame and Glass, and they matched in very well. The chain is a mix of handmade links, commercial chain and the aforesaid beads wire-wrapped.


The top of the wand cap has the same design as around the sides, and it is finished with my Joy logo on one side, and three little faux rivets on the other side.

I was pleased that the shrinkage worked out really well on this. At the moment the wand is firmly in place with just a friction fit, but I will remove it to send the piece for hallmarking. I'll add a touch of glue when I refit it for added security.

It was fun to consolidate two of the techniques from my earlier challenge pieces, the wand setting and the beaded chain. I will be doing more faceted wands in the future - they are harder to do than this round one was!! :)

Have fun!

Joy x

PS have you signed up for my newsletter yet? First issue will be out in a while so don't miss it!

Related Posts with Thumbnails